
In 2024, the trend of sleek and seamless kitchen designs continues to dominate, with undermount sinks playing a pivotal role. This guide, “The Ultimate Guide to Installing and Maintaining Undermount Sinks in 2024,” provides comprehensive insights into selecting, installing, and caring for these sinks. Whether you’re upgrading your kitchen or replacing an old sink, understanding the nuances of undermount sinks is crucial. From different materials and installation techniques to maintenance tips and troubleshooting common issues, this guide covers everything you need to know to keep your kitchen both functional and stylish.
Table of Contents
- Can You Install an Undermount Sink After the Countertop?
- Replace Undermount Sink
- Undermount Sink in Concrete Countertop
- Do You Install Undermount Sink Before Countertop?
- How to Replace an Undermount Sink
- Replacing an Undermount Sink in Granite
- How to Seal Sink to Counter
- Sink Detached from Countertop
- Silicone for Sink Installation
- Mounted Sink in Kitchen
- Replace Sink Without Changing Countertop
- How to Install an Undermount Sink to Quartz
- Can You Replace an Undermount Sink with a Drop-in Sink?
- Under Counter Sink Mounting Brackets
- How to Install Granite on Concrete
- How to Install Sink into Countertop
- Undermount Sinks for Granite Countertops
- Kitchen Sink with Countertop
- Can You Remove an Undermount Sink from Granite?
- How to Caulk Around Kitchen Sink
- Undermount Sink Sealant
- Recessed Kitchen Sink
- How to Install a Sink Flange
- Undermount Sink Installation Kit
- Replace Undermount Sink Granite
- Kitchen Sink Cabinet Countertop
- Counter Over Sink
- Changing Sink in Granite Countertop
- Granite Countertops with Undermount Sinks
- How to Change Undermount Sink
- Conclusion
- Can you install an undermount sink after the countertop?
- . What are the benefits of an undermount sink?
- How do you replace an undermount sink without removing the countertop?
- What materials are best for undermount sinks in 2024?
- How do you seal an undermount sink to the countertop?
- Can you replace an undermount sink with a drop-in sink?
- How do you maintain an undermount sink?
- What is the average lifespan of an undermount sink?
- What are common issues with undermount sinks?
- Is professional installation necessary for undermount sinks?
Can You Install an Undermount Sink After the Countertop?
Yes, you can install an undermount sink after the countertop has been installed, but it requires careful measurement and precise cutting. This process often involves removing the countertop, cutting a hole to fit the sink, and then re-installing both the sink and countertop. Professional installation is recommended to ensure a proper fit and secure attachment.
Replace Undermount Sink
Replacing an undermount sink can be challenging but manageable with the right tools and steps. First, you need to detach the old sink by removing the mounting brackets and cutting the sealant. After removing the old sink, clean the countertop area thoroughly before placing the new sink. Apply a bead of silicone sealant around the edge of the new sink and secure it with new mounting brackets.
Undermount Sink in Concrete Countertop
Undermount sinks in concrete countertops offer a sleek, modern look. The installation process is similar to other countertops but requires additional support due to the weight of the concrete. Ensure that the sink is securely fastened with robust brackets and silicone sealant to prevent any movement or leaks.
Do You Install Undermount Sink Before Countertop?
Installing the sink before the countertop is often preferred because it allows for a more secure attachment. The countertop can be precisely cut to fit the sink, and the sink can be securely fastened with brackets and sealant. This method ensures a tight fit and minimizes the risk of leaks.
How to Replace an Undermount Sink
- Detach the Old Sink: Remove the mounting brackets and cut through the silicone sealant.
- Remove the Sink: Carefully lift the sink out from underneath the countertop.
- Prepare the Area: Clean the countertop surface thoroughly to remove any old sealant or debris.
- Install the New Sink: Apply silicone sealant around the edge of the new sink, position it correctly, and secure it with mounting brackets.
- Seal and Test: Allow the sealant to dry, then test for any leaks by running water.
Replacing an Undermount Sink in Granite
Replacing an undermount sink in granite follows the same basic steps as other materials but requires careful handling due to the weight and fragility of granite. It’s crucial to ensure that the new sink fits perfectly into the existing cutout, or you may need to modify the granite, which should be done by a professional.
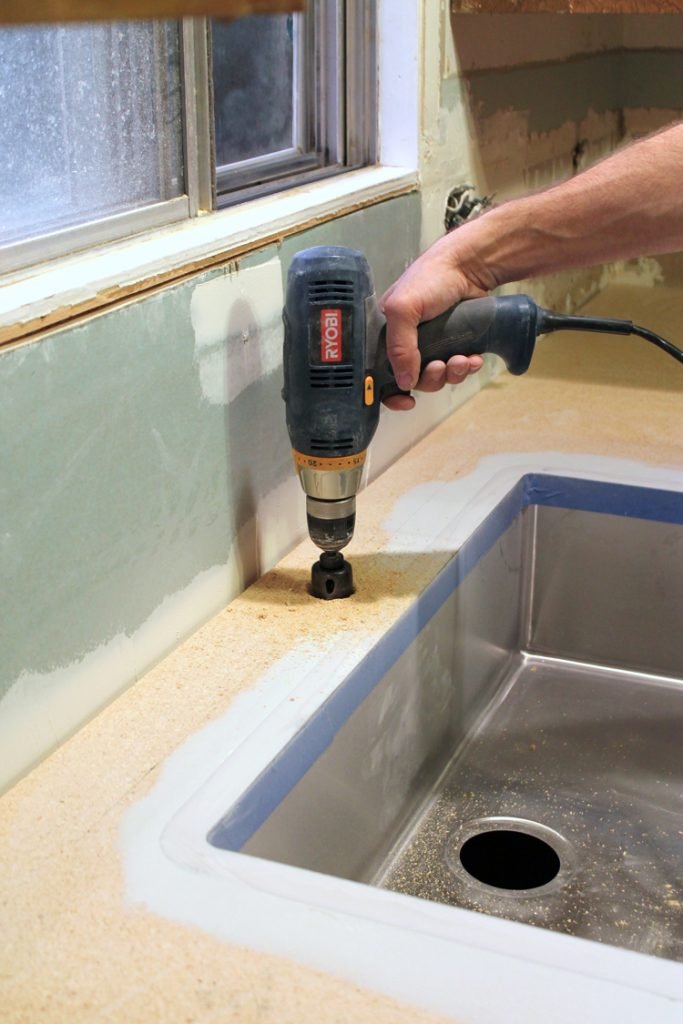
Undermount Sink Bracket and Mounting
Mounting brackets are essential for securing an undermount sink. They attach to the underside of the countertop and hold the sink in place. It’s important to use the correct type of brackets for your sink and countertop material to ensure a secure fit.
How to Seal Sink to Counter
Sealing the sink to the counter is crucial to prevent leaks. Use a high-quality silicone sealant around the edge of the sink. Apply a continuous bead of sealant, press the sink into place, and smooth the sealant with a tool or your finger for a neat finish.
Sink Detached from Countertop
If your sink has detached from the countertop, it’s likely due to the failure of the mounting brackets or sealant. Reattach the sink by cleaning the surfaces, applying fresh silicone sealant, and securing it with new mounting brackets. Allow the sealant to cure fully before using the sink.
Silicone for Sink Installation
Silicone sealant is essential for creating a watertight seal between the sink and the countertop. Choose a high-quality, mold-resistant silicone and apply it generously around the sink’s edge before securing it in place.
Mounted Sink in Kitchen
Mounted sinks, whether undermount or top-mount, need to be securely attached to the countertop to ensure stability and prevent leaks. Follow the manufacturer’s instructions and use the appropriate brackets and sealant for your sink and countertop material.
Replace Sink Without Changing Countertop
To replace a sink without changing the countertop, carefully remove the old sink by detaching the brackets and cutting the sealant. Clean the area thoroughly before installing the new sink using the same methods.
How to Install an Undermount Sink to Quartz
Quartz countertops are popular for their durability and aesthetic appeal. When installing an undermount sink to quartz:
- Prepare the Area: Ensure the cutout is the right size and clean.
- Apply Sealant: Apply a bead of silicone sealant around the edge of the sink.
- Position the Sink: Place the sink under the countertop, align it, and press it firmly into the sealant.
- Secure with Brackets: Use mounting brackets to secure the sink to the quartz countertop.
- Allow to Cure: Let the sealant cure fully before using the sink.
Can You Replace an Undermount Sink with a Drop-in Sink?
Yes, you can replace an undermount sink with a drop-in sink, but it will require modifying the countertop. A drop-in sink has a rim that sits on top of the countertop, so the existing cutout may need to be adjusted. Ensure the new sink fits properly and is securely sealed and mounted.
Under Counter Sink Mounting Brackets
Mounting brackets for under-counter sinks are critical for a secure installation. They attach the sink to the underside of the countertop, ensuring it stays in place. Use the appropriate brackets for your sink and countertop material.
How to Install Granite on Concrete
Installing granite on concrete involves several steps:
- Prepare the Concrete: Ensure the concrete surface is clean and level.
- Apply Adhesive: Use a high-quality adhesive suitable for both granite and concrete.
- Place the Granite: Carefully place the granite slab onto the adhesive, ensuring it is aligned correctly.
- Secure in Place: Apply pressure and use clamps or weights to hold the granite in place until the adhesive sets.
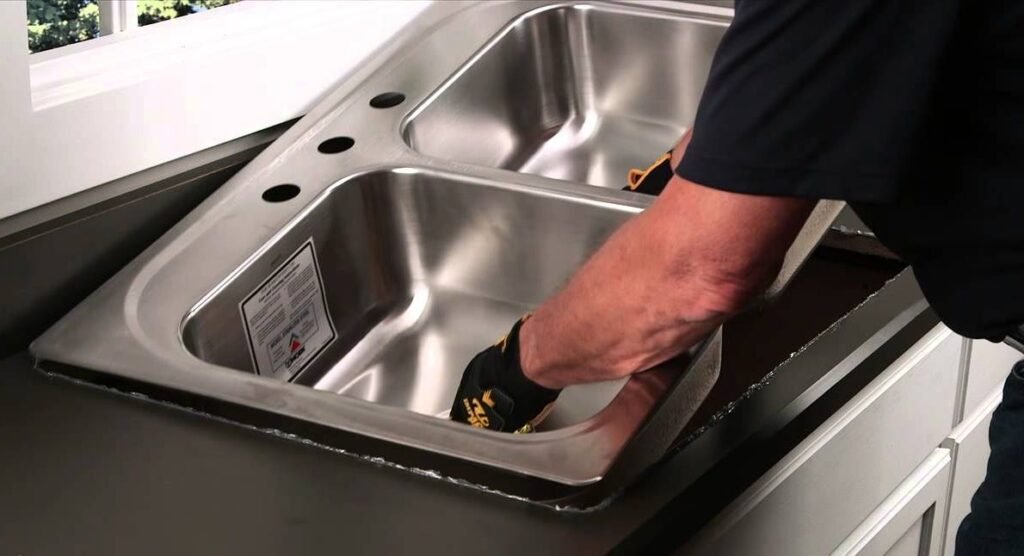
How to Install Sink into Countertop
Installing a sink into a countertop involves:
- Cutting the Hole: Use a template to mark and cut the hole in the countertop.
- Positioning the Sink: Place the sink into the cutout and check for fit.
- Applying Sealant: Apply silicone sealant around the edge of the sink.
- Securing the Sink: Use mounting brackets to secure the sink to the countertop.
Undermount Sinks for Granite Countertops
Undermount sinks are popular for granite countertops due to their sleek appearance and easy cleaning. Ensure the sink is securely fastened with appropriate brackets and a good sealant to prevent leaks and ensure stability.
Kitchen Sink with Countertop
A kitchen sink with an integrated countertop offers a seamless, modern look and is easier to clean. These setups are custom-made, so precise measurements and professional installation are often required.
Can You Remove an Undermount Sink from Granite?
Yes, you can remove an undermount sink from granite by carefully cutting through the silicone sealant and detaching the mounting brackets. Be cautious not to damage the granite during the removal process.
How to Caulk Around Kitchen Sink
Caulking around a kitchen sink involves applying a bead of silicone sealant to fill gaps and create a watertight seal. Smooth the caulk with a tool or your finger to ensure a neat finish and prevent water from seeping under the sink.
Undermount Sink Sealant
Using the right sealant is crucial for undermount sinks. A high-quality silicone sealant creates a durable, watertight bond between the sink and the countertop. Apply it generously and allow it to cure fully before using the sink.
Recessed Kitchen Sink
A recessed kitchen sink, also known as an undermount sink, sits below the countertop level, creating a seamless look. This design is popular for modern kitchens and makes cleaning up spills and crumbs easy.
How to Install a Sink Flange
Installing a sink flange involves:
- Positioning the Flange: Place the flange in the sink drain opening.
- Applying Plumber’s Putty: Apply plumber’s putty around the underside of the flange.
- Securing the Flange: Press the flange into place and tighten the mounting nut from underneath.
- Connecting the Drain: Attach the drain pipes and ensure everything is watertight.
Undermount Sink Installation Kit
An undermount sink installation kit typically includes mounting brackets, screws, and sometimes a template for cutting the countertop. Using a kit can simplify the installation process and ensure all necessary components are included.
Replace Undermount Sink Granite
Replacing an undermount sink in a granite countertop involves:
- Removing the Old Sink: Detach the brackets and cut through the sealant.
- Preparing the Area: Clean the granite surface thoroughly.
- Installing the New Sink: Apply silicone sealant, position the sink, and secure it with new brackets.
- Testing for Leaks: Allow the sealant to cure and test for any leaks.
Kitchen Sink Cabinet Countertop
The cabinet and countertop surrounding the kitchen sink should be sturdy and properly sealed to prevent water damage. Ensure the cabinet can support the weight of the countertop and sink, especially if using heavy materials like granite or concrete.
Counter Over Sink
A counter over the sink can provide additional workspace and hide the sink when not in use. This design is often used in small kitchens to maximize counter space.
Cutting Hole in Countertop for Sink
Cutting a hole in the countertop for a sink involves:
- Marking the Cutout: Use a template to mark the cutout area.
- Cutting the Hole: Use a jigsaw or router to cut along the marked lines.
- Smoothing the Edges: Sand the edges to remove any rough spots and ensure a smooth finish.
Changing Sink in Granite Countertop
Changing a sink in a granite countertop requires precision to avoid damaging the granite. Remove the old sink by cutting the sealant and detaching the brackets, then clean the area and install the new sink using the same methods.
Granite Countertops with Undermount Sinks
Granite countertops with undermount sinks are popular for their sleek appearance and easy maintenance. Ensure the sink is securely attached with appropriate brackets and sealant to prevent leaks and ensure stability.
How to Change Undermount Sink
To change an undermount sink:
- Remove the Old Sink: Detach the brackets and cut through the sealant.
- Clean the Area: Thoroughly clean the countertop surface.
- Install the New Sink: Apply silicone sealant, position the new sink, and secure it with brackets.
- Allow to Cure: Let the sealant cure fully before using the sink.
By following these guidelines and tips, you can successfully install, replace, and maintain your undermount sink, ensuring it remains a functional and stylish part of your kitchen for years to come.
Conclusion
In 2024, undermount sinks continue to enhance the functionality and aesthetics of modern kitchens. “The Ultimate Guide to Installing and Maintaining Undermount Sinks in 2024” has provided you with comprehensive insights into selecting, installing, and maintaining these sinks to ensure they serve you well for years to come. By following the detailed instructions and tips outlined in this guide, you can achieve a seamless installation, address common issues, and keep your sink in top condition. Embrace the sleek design and practical benefits of undermount sinks to elevate your kitchen experience and enjoy a stylish, easy-to-maintain workspace.
Can you install an undermount sink after the countertop?
Yes, you can install an undermount sink after the countertop has been installed. However, it requires precise measurement and cutting of the existing countertop to fit the sink. Professional assistance is recommended to ensure a proper fit and secure attachment.
. What are the benefits of an undermount sink?
Undermount sinks provide a sleek, seamless look to your kitchen. They make countertop cleanup easier since there is no rim to trap debris. Additionally, they offer more counter space and enhance the overall aesthetic of the kitchen.
How do you replace an undermount sink without removing the countertop?
To replace an undermount sink without removing the countertop, carefully detach the old sink by removing the mounting brackets and cutting through the sealant. Clean the area thoroughly, apply a new bead of silicone sealant around the new sink, and secure it with new brackets.
What materials are best for undermount sinks in 2024?
Stainless steel, granite composite, and fireclay are popular materials for undermount sinks in 2024. Stainless steel is durable and easy to clean, granite composite offers a high-end look and resistance to scratches, and fireclay provides a classic, elegant appearance with excellent durability.
How do you seal an undermount sink to the countertop?
To seal an undermount sink, apply a continuous bead of high-quality silicone sealant around the edge of the sink. Press the sink firmly into place and smooth the sealant with a tool or your finger to ensure a watertight seal. Allow the sealant to cure fully before using the sink.
Can you replace an undermount sink with a drop-in sink?
Yes, you can replace an undermount sink with a drop-in sink. However, this may require modifying the countertop cutout to fit the new sink. Ensure the new sink fits properly and is securely sealed and mounted.
How do you maintain an undermount sink?
Maintain an undermount sink by regularly cleaning it with mild soap and water to prevent stains and buildup. Avoid using abrasive cleaners that can scratch the surface. Check the sealant periodically for any signs of wear or gaps and reapply if necessary to prevent leaks.
What is the average lifespan of an undermount sink?
The average lifespan of an undermount sink can range from 15 to 30 years, depending on the material and how well it is maintained. Stainless steel sinks tend to last longer due to their durability and resistance to corrosion.
What are common issues with undermount sinks?
Common issues with undermount sinks include detachment from the countertop, leaks due to failed sealant, and difficulty in replacing the sink without removing the countertop. Regular maintenance and proper installation can help prevent these issues.
Is professional installation necessary for undermount sinks?
While DIY installation is possible, professional installation is often recommended for undermount sinks to ensure a secure fit and proper sealing. Professionals have the tools and experience to handle the precise measurements and techniques required for a successful installation.