
An aerator is a crucial part of your kitchen faucet. Its number one feature is to distribute water and maintain optimum pressure, preserve water, or shape the stream you want. Thus, retaining your faucet aerator on an ordinary foundation guarantees that you can hold those benefits at the same time as enhancing the existence of your faucet.
The first step to preserving your kitchen faucet running smoothly is to make sure it’s clean, beginning with the aerator. This critical part of your faucet mixes air with the water, decreasing irrigation glide and increasing water stress. Over time, an aerator can clog up debris, such as mineral deposits, that could preclude its operation.
Steps To Clean Kitchen Faucet Aerator
Cleaning your kitchen faucet aerator is vital to preserve water flow and save you dirt and mineral buildup. Over time, air conditioners can come to be clogged, allowing water pressure to drop and bacteria to develop. Follow those simple steps to very well ease your kitchen faucet aerator.
1. Gather your components
Before you start, make certain you have got all the essentials:
- Pliers or an adjustable wrench
- An old toothbrush or a small cleansing brush
- White vinegar or lime scale elimination
- Wash a curtain or door
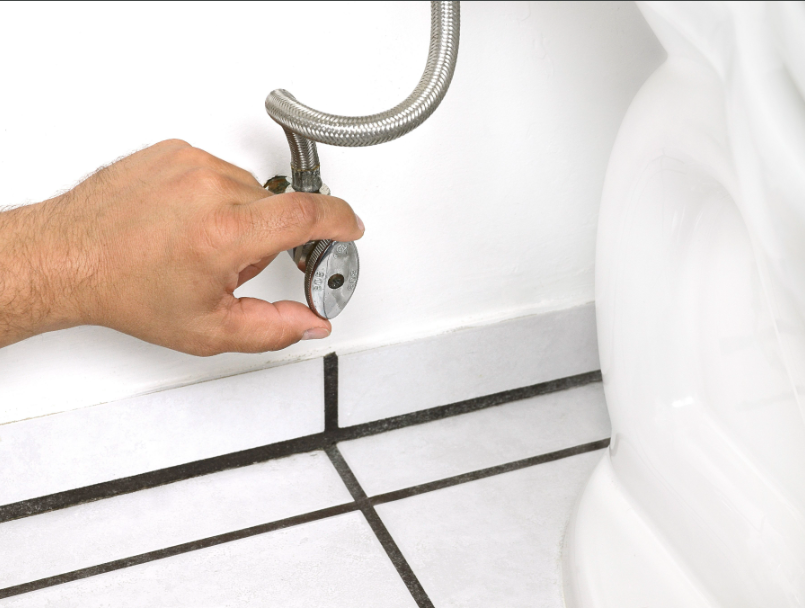
2. Turn off the water supply
Turn off the faucet water utilizing putting in a shutoff valve below the sink. This prevents water from escaping when cleansing the air conditioner.
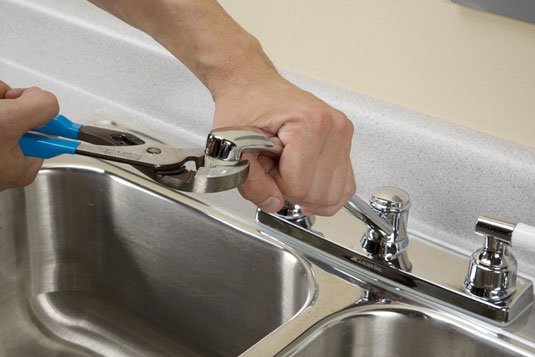
3. Remove the aerator
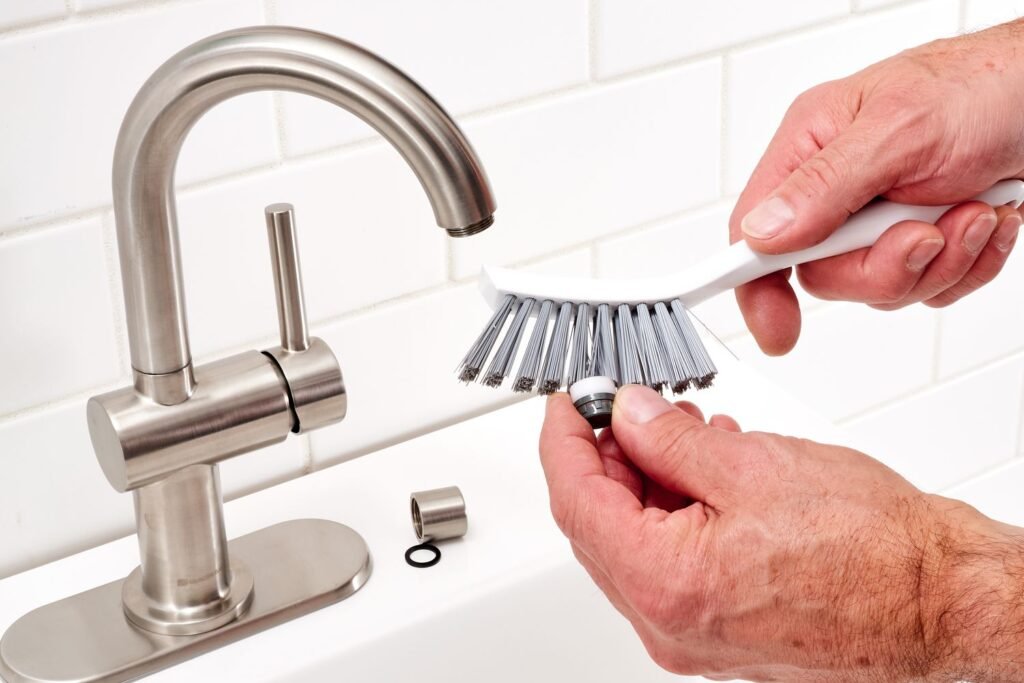
Using pliers or an adjustable wrench, cautiously release the aerator from the faucet spout counterclockwise. Be mild to avoid unfavorable air on or plumbing.
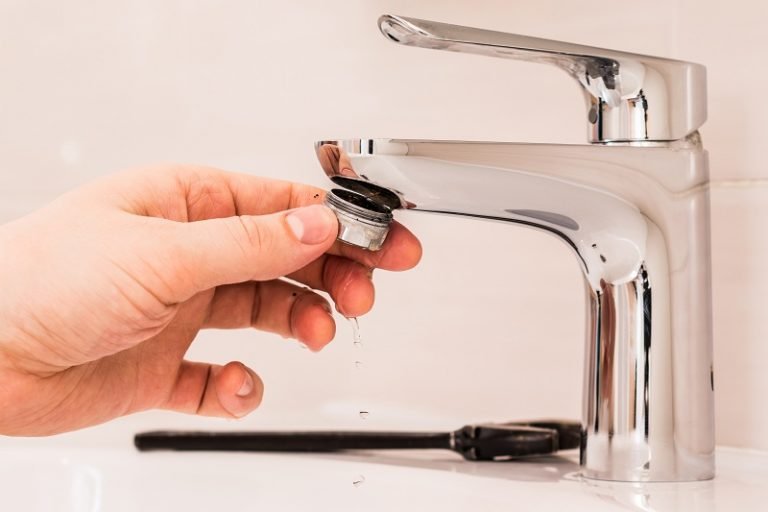
4. Disconnect the aerator
Once removed, carefully disconnect the aerator. It generally has several components including displays, washers, and O-rings. Place them in equal order as you dispose of them to make reassembly simpler.
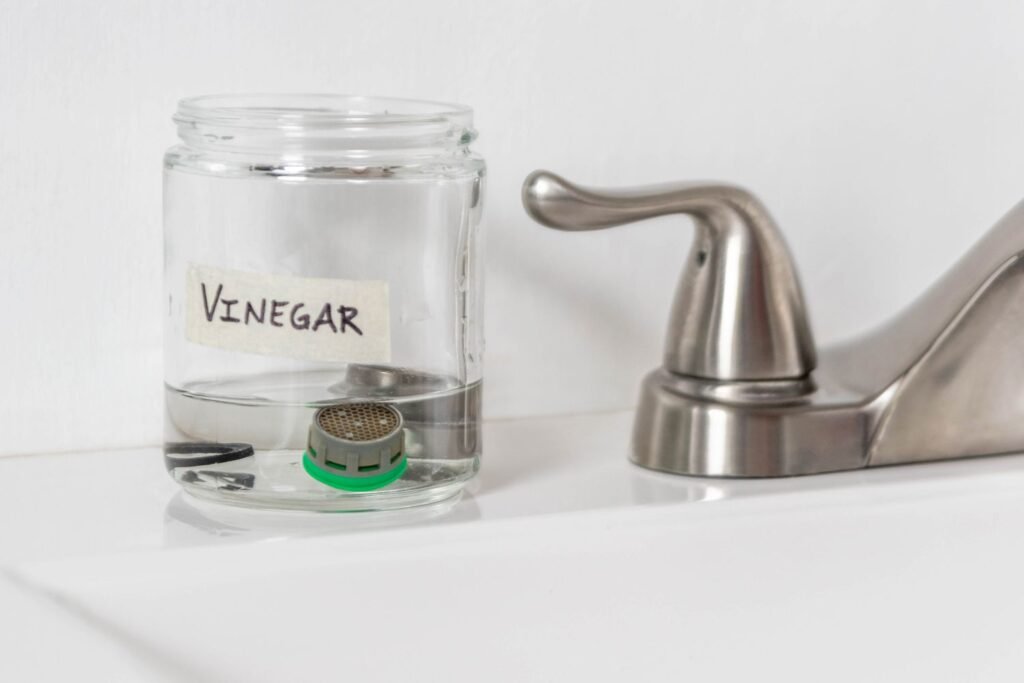
5. Soak in vinegar solution
Fill a small bowl or cup with white vinegar or limescale remover solution. Submerge the aerator components inside the solution and allow it to soak for 30 minutes to an hour. Vinegar helps dissolve mineral deposits and different buildup.
6. Scrub elements
After set up, gently scrub every part of the aerator with an antique toothbrush or a small cleansing brush. Pay close attention to the display screen, as this is where the maximum of the damage and accumulation accumulates.
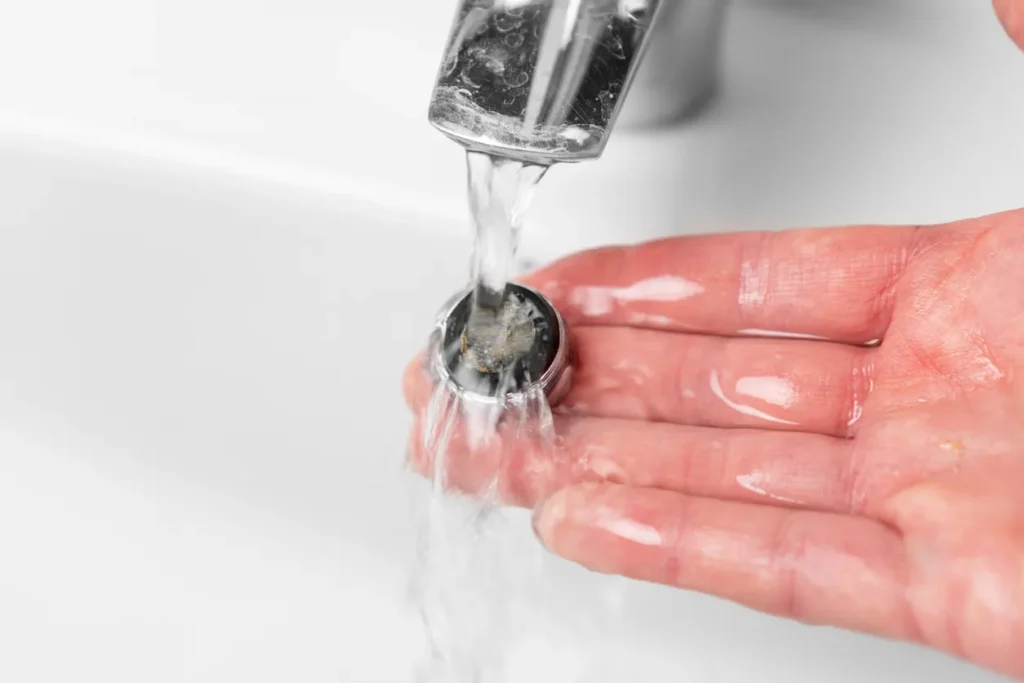
7. Proper washing
Once washed, each piece can be washed below walking water to get rid of any remaining dust and vinegar. Make certain all elements are easy and free of debris.
8. Reassemble the aerator
Carefully reassemble the aerator to ensure that each one is in the right order. Secure every facet together with your arms, however, keep away from over-tightening to avoid damage.

9. Reinstall the faucet
Insert the aerator again into the faucet spout clockwise. Tighten it securely with pliers or an adjustable wrench, however again, be cautious now not to tighten it too tightly.

10. Turn on the water supply
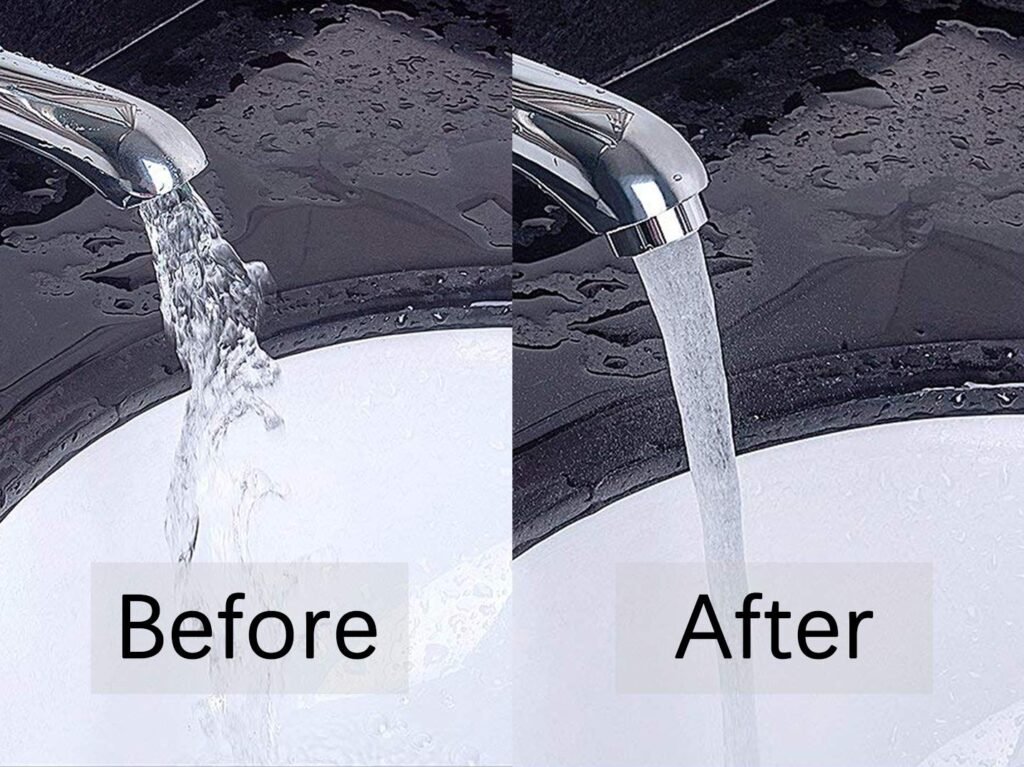
Finally, open the shutoff valve underneath the sink and turn the water supply returned on. Test the kitchen faucet for correct flow and strain. If important, repeat the cleansing or search for professional help if troubles persist.
What is the Maintenance recommendation for the kitchen Faucet Aerator?
Following are the maintenance recommendations for the kitchen Faucet Aerator.
Regular Cleaning
Make it a habit to smooth your faucet aerator every few months even in case you don’t observe any problems with the waft. This system prevents mineral buildup and maintains constant performance.Use a Water Softener
If you live in an area with hard water, keep in mind putting in a water softener in all your pipes or putting in a faucet-installed softener may be used. Softening allows lessen the mineral content and lengthens the time between cleanings.
Check for Symptoms of Production
Periodically inspect the aerator for minerals or sediment buildup. Look for reduced glide or irregular go-with-the-flow, as these might also indicate a clogged air conditioner.
Gentle Cleaners
Use mild cleaners including vinegar or limescale remover whilst cleaning the windshield. Avoid harsh chemicals or air cleaners which could harm air conditioning components or faucet finishes.
Preventive Measures
Consider installing a drip filter or whole-house filter to prevent particles from getting into the plumbing device. These structures can assist amplify the lifestyles of your aerator and decrease the frequency of protection.
Monitor Water Pressure
Monitor the water pressure out of your faucet. A sudden pressure drop may additionally suggest a clogged air duct or different plumbing. Address any strain problems right now to save you from similar harm or complications.
Replace Seals If Necessary
Over time, the seals inside the air clear out can put on out, causing leaks or decreased overall performance. If you locate that leaks persist even after cleaning, don’t forget to replace the seal or the complete air conditioner.
Want to learn more about faucet maintenance? Check out our guide on How to Replace a Faucet Aerator.
Avoid Pressure Cleaning
Avoid the usage of excessive force or cleansing on harsh surfaces whilst cleansing air conditioners, especially on dedicated parts such as mash screen.
Educate Family Members
Make certain everyone in your home understands how vital it is to preserve the faucet air inappropriate running order. Family members need to be reminded to avoid doing things like scrubbing paintbrushes or washing hair in the sink that might allow dirt or other debris to enter the air and clear out
Professional Help
If your faucet has recurring problems and you note a construct-up of minerals that you can’t remove, you must take into account calling in a plumbing expert to inspect the aerator and plumbing gadget. They can discover any hidden issues and provide expert advice on maintenance and renovation.
Conclusion
Maintaining a clean kitchen faucet aerator is vital to make sure water floats, pressures, and is fine for your kitchen. By following those simple steps, you may without problems ease your aerator and save mineral buildup and particle buildup.
Not best does normal maintenance improve the performance of your faucet but it also extends its lifespan, saving you money and time on upkeep or replacements
By incorporating those protection suggestions into your routine, you can keep your kitchen faucet aerator in top shape, making sure a constant flow of quality water for all of your cooking and cleaning purposes.
To test and fix any problems in case you encounter persistent problems or issues -put off builds Do no longer hesitate to search for professional assistance. With proper care and renovation, your kitchen faucet aerator will keep you running smoothly easily, and successfully for many years to come.
How regularly do I clean my kitchen faucet aerator?
It is usually recommended to clean your kitchen faucet aerator every few months even if you don’t notice any troubles with the water drift. Regular cleaning facilitates saving you mineral buildup and debris buildup and presents optimal water strain and first-class.
What if I have difficult water? How does it affect wash frequency?
If you live in a place with hard water, you could need to clean your faucet aerator more regularly due to its higher mineral content material. Consider including a water softener or the use of a filter with a faucet to reduce the mineral content material and lengthen the time between cleanings.