
Is your Delta kitchen faucet dripping or malfunctioning? One possible reason, for this issue could be a cartridge. The cartridge plays a role in your faucet by regulating the water flow. As time passes it may wear down. Get damaged resulting in leaks or challenges, in adjusting the water temperature and flow.
In this manual we’ll walk you through the process of replacing the cartridge in your Delta kitchen faucet. Whether you enjoy DIY tasks or are a primary time homeowner you will find this user friendly and informative guide to be quite on hand.
Step 1: Gather Tools and Materials
Make sure to accumulate all the equipment and materials earlier than starting.
Here’s a checklist of what you should have:
- Adjustable wrench
- Phillips head screwdriver
- New Delta faucet cartridge (make sure it matches your faucet model)
- Clean cloth or rag
- Plumbers grease (recommended)
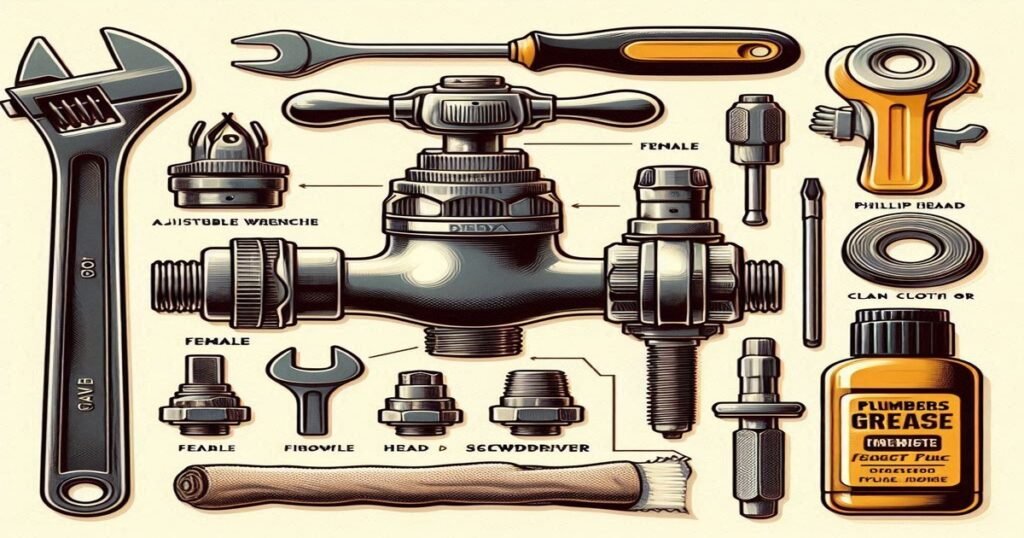
Having these items prepared will make the job easier. Ensure you have everything to finish the task smoothly.
Step 2: Shut Off the Water Supply
Make sure to show off the water deliver earlier than you begin operating in your tap. Give them a clockwise turn until they are completely closed. This step is essential to stop water flow during your faucet repair reducing the chances of any leaks or water related issues.
Step 3: Remove the Faucet Handle
To start grab a Phillips screwdriver. Carefully unscrew the fastener holding the faucet handle in position. After removing the screw gently lift the handle from the faucet body. Place the handle in a spot to avoid misplacing or causing any harm to it.
Step 4: Remove the Bonnet Nut
Once you’ve taken off the handle you can then reach the bonnet nut that holds the cartridge in position.

Grab a wrench to loosen and take off the bonnet nut by turning it to the left. Be careful. Go slowly to prevent any harm to the nut or nearby parts.
Step 5: Extract the Cartridge
After taking off the bonnet nut carefully take out the cartridge from the faucet body. Depending on your faucet type you might need pliers or a cartridge removal tool to grasp and remove the cartridge. Handle it with care to prevent any harm to the faucet housing.
Step 6: Replace with a New Cartridge
Now that you have removed the cartridge it’s time to put in the one. Take your replacement Delta faucet cartridge. Insert it carefully into the cartridge housing. Make sure it is correctly aligned and securely seated in place.

Step 7: Reassemble the Faucet
Once you’ve installed the cartridge assemble the faucet in order of disassembly. Begin by reattaching the nut and securely tightening it using a wrench.Then slide the tap handle onto the rod. Fasten it in position, with a screw using a Phillips screwdriver.
Step 8: Turn On the Water Supply
After putting everything back you should now switch the water supply on. Go back, to the shut off valves located under the sink. Slowly turn them counterclockwise to bring water back to the faucet. Keep an eye out for any leaks, near the handle and base of the faucet while the water starts flowing.
Step 9: Flush the Faucet
Once you’ve opened the water supply allow the tap to run for a couple of minutes to clear out any air or particles, from the pipes. This step will guarantee an continuous flow of water when the faucet is ready, for use.
Step 10: Check for Leaks
When the water is running from the faucet take a look, at the handle spout and base to check for any signs of leaks. Be sure to focus on the connections and joints where leaks could happen. If you see any leaks tighten the fittings or connections that are affected to prevent leakage.
Step 11: Test the Faucet
After ensuring there are no leaks proceed to test the faucets performance. Rotate the handle to both cold settings examining operation and steady water flow. Test the temperature control to ensure it’s working correctly.
Step 12: Clean Up
Be sure to prepare all of your equipment, substances and any muddle to your workspace. Use a material or rag to clean the tap and the place, round it to get rid of any dirt or dirt.
Conclusion
Swapping out a Delta kitchen tap cartridge is not as daunting as it can seem. Honestly observe the commands supplied in this guide to restore leaks and beautify your faucet capability. Be sure to gather your tools shut off the water supply and proceed through each Step carefully.
Once you’ve installed a cartridge you’ll experience improved water flow and precise temperature adjustments at your kitchen sink. If vital do not hesitate to are looking for help. however, with a few persistence and willpower, you could efficaciously address this DIY project.
For more information on how to replace a cartridge on a Moen faucet, click here.
FAQs
What’s a Tap Cartridge?
A faucet cartridge serves as a thing, inside your Delta kitchen tap that manages both the water drift and temperature. It essentially acts because the control centre of your tap.
How can I inform if my Tap Cartridge Wishes to get Replaced?
If you take a look at any leaking, dripping or problems in regulating water temperature along with your faucet it’d indicate that the cartridge requires replacement. If your tap is aged and hasn’t been modified for a while it’s recommended to investigate the cartridge.
Are There Any Tools Required to Replace the Cartridge?
you’ll want a few equipment, like a wrench and a Phillips screwdriver. it is also properly to have a fabric or rag on hand. If uncertain refer to the instructions provided with your faucet. Are seeking for advice from a professional.
How long does it usually take to Change a Faucet Cartridge?
Replacing a tap cartridge normally calls for approximately 30 minutes to an hour depending on how familiar you’re, with the method and the complexity of your faucet version. It’s quite a undertaking.
Can I Swap out the Cartridge on my own. Should I get a plumber to do it?
If you’re comfortable, with using tools and following instructions you should be able to replace the cartridge yourself. simply remember to Shut off the water supply before starting and thoroughly follow the stairs supplied inside the guide. If you’re feeling unsure or hesitant recollect reaching out to a plumber for help.
Where can I find a Delta Faucet Cartridge, for Purchase?
You should purchase a Delta tap cartridge at hardware stores, home improvement centres or on-line outlets. it is crucial to pick the version it truly is like minded along with your faucet to make certain right set up and capability. In case you’re unsure approximately which version to choose you may refer to the version with a wide variety furnished in your faucet packaging or office work for guidance.